Friday, October 29, 2010

Installing a baseboard heater and remote thermostat

What I am doing here is what I am comfortable with, and feel that I can do safely.  I do not recommend you attempt this if you aren't  absolutely sure you can.

Our house still has the old electric floor heaters like the one below.  There is one in the living room and one in the hallway that supplies heat to the entire house, which is two stories tall.  After last winter, and seeing the electric bills, I decided to go with baseboard heaters in each room to maintain the comfort level.  The rooms were all over the place as far as temps go, and I want to try to even them out by installing baseboard heaters in each room.  Until we can afford to install central heat and air, these new baseboard heaters will have to do.  
Old 240 volt electric floor heater
I want to give a quick bit of information about the heaters and how I sized them for each room.  I have five 30 amp, 240 volt circuits available to me.  These are old circuits that were used before we got the house to run space heaters and window air conditioners.  I left all the wall outlets in their original locations and ran new wire to them when we rewired the house in this blog .  I ran all new 10 gauge wire to them which will allow a maximum of 5760 watts per circuit as stated by the heater manufacturer.   They also recommend an old house like mine, which is insulated well, to use 10 watts per square foot of room space as a guideline for sizing the heater(s).  There are a lot of variables involved when sizing the heater for a room, so check with the manufacturers, they have lots of charts and other useful info.  The largest room I have is the master bedroom which is 384 square feet, so I will need 4000 watts, followed by the living room which is 247 square feet, or 2500 watts.  Here in the dining room I have to heat 110 square feet.  I went with a 1500 watt heater because it was an in stock item at Lowes.  I could have special ordered one that was 1250 watts, which would have done the job, but I didn't want to wait and figured another 250 watts couldn't hurt.  Fahrenheat makes heaters from 500 watts to 2500 watts, and the Lowes store in my area carries some of them in stock.

The manufacturer recommends installing the heater under a window.  This is because the cold air dropping from the cold window creates a convection current and circulates the air.  Here is a diagram I found that helps explain the current.

Convection current explained
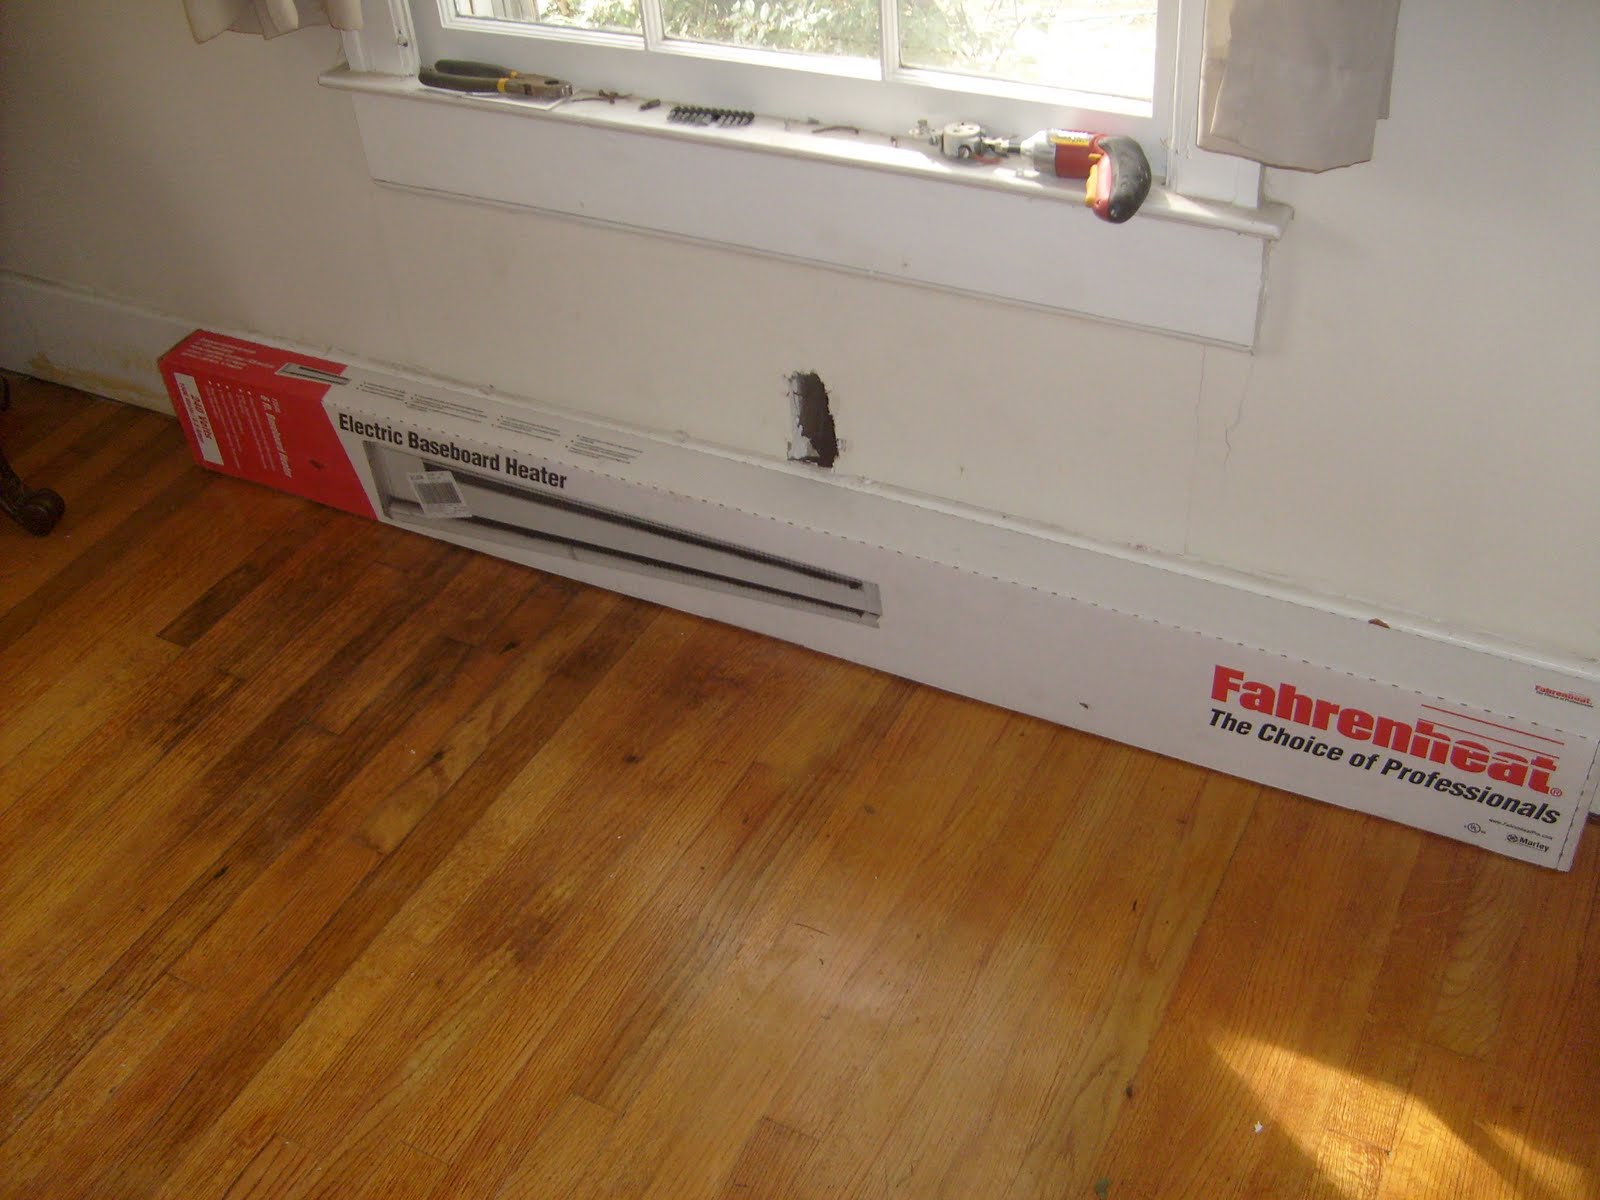
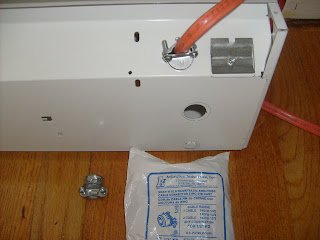
Location selected for dining room baseboard heater
The hole in wall is where a 240 volt receptacle was for a window air conditioner.  I removed the outlet and box, then pulled the wire from the breaker box down into the basement.  I marked the location of the 72 inch heater centered on the baseboard under the window.
Fahrenheat 1500 watt electric baseboard heater 
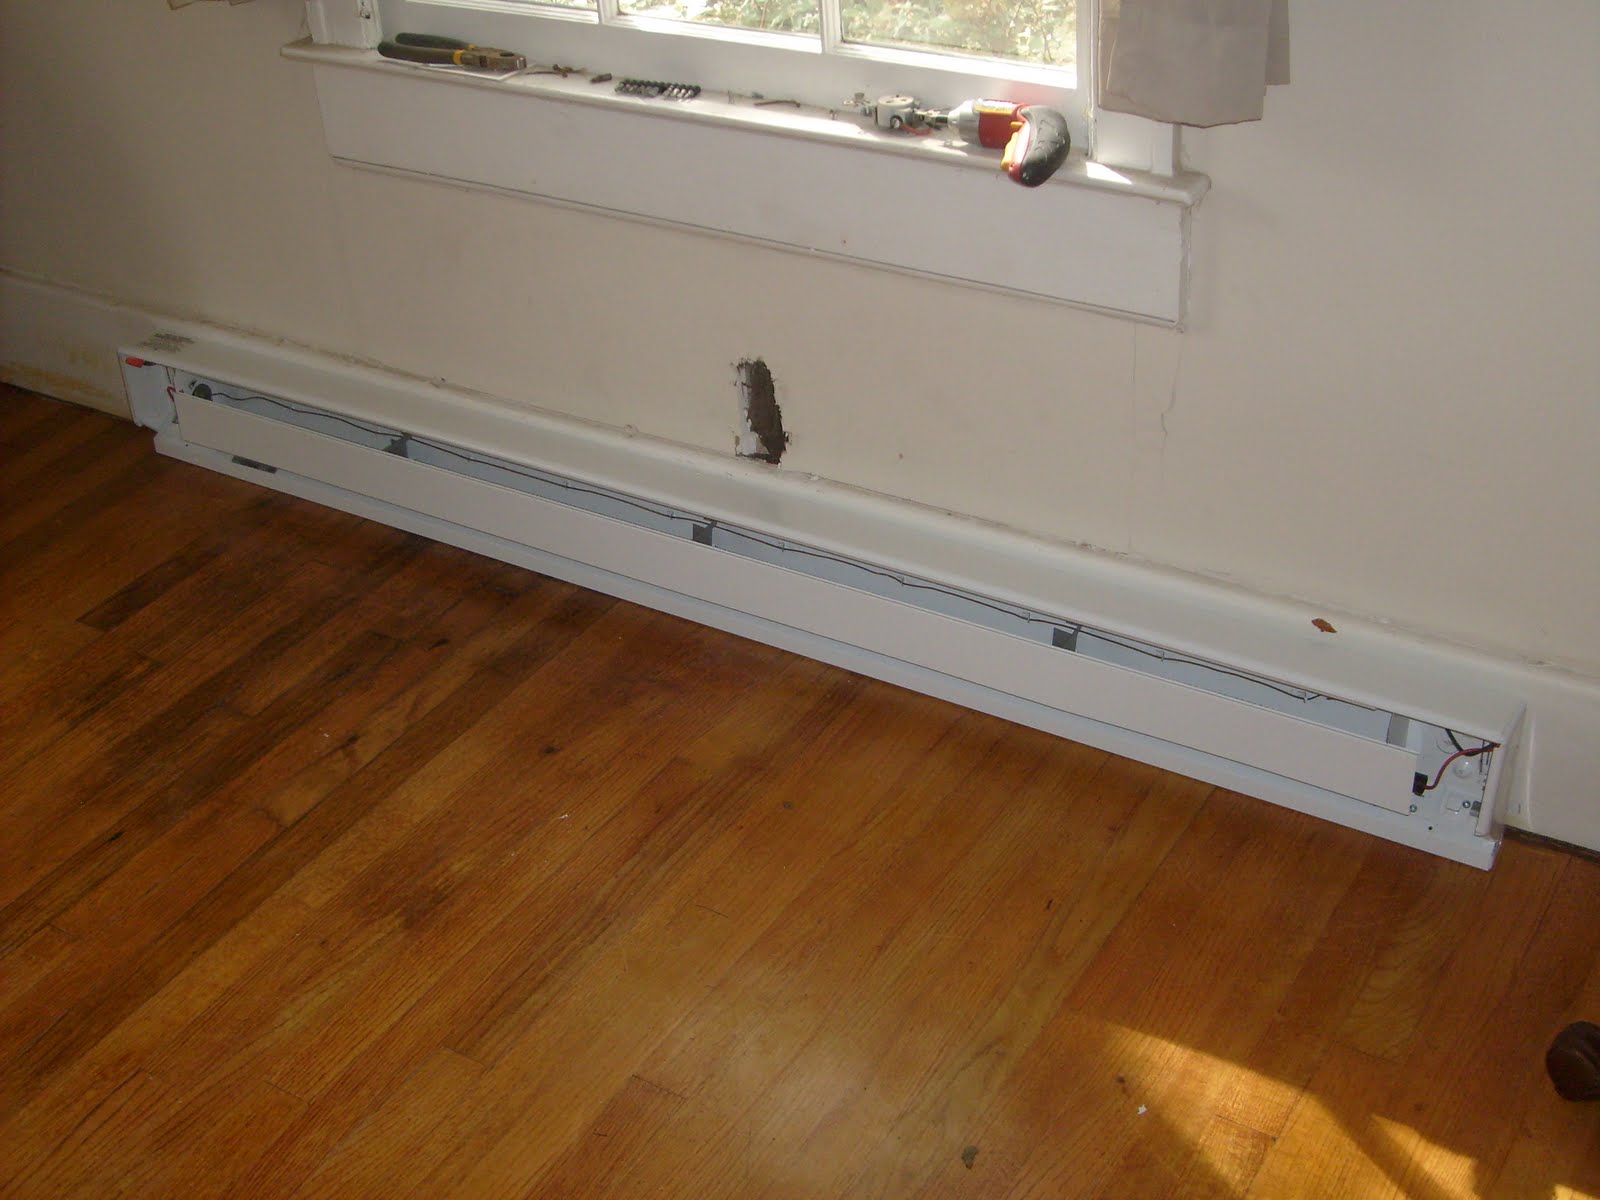
I unboxed the heater and removed the covers on the ends to gain access for wire connections and mounting to be done later.
Fahrenheat 1500 watt electric baseboard heater 
Each heater requires it's own thermostat, and they DO NOT come with them.  Your choices are either a unit mount or a remote wall mounted thermostat, and both have their pros and cons.  The unit mount thermostat fits on either end of the heater and does not require running any additional wire so they are easy to install.  They also cost more than wall mounts (about $8 here).  A wall mount thermostat should be located on a wall opposite the heater and does requires you to run extra wire.  50 feet of 10/2 wire was about $50, so that needs to be factored in.  I copied this from the Cadet website,
 "  Is an in-built or a wall mount thermostat better?  An in-built control is convenient to install when the walls are already finished. However, a wall thermostat is a more accurate way to control the room temperature, is more convenient to use, and has a broader selection of models.". 

I went with a remote thermostat because it seemed logical to me that a wall mount would maintain the temperature better and we wouldn't have to bend over or get behind something that may be blocking access to the thermostat if it was mounted on the heater.  I selected a location opposite the heater 5 feet from floor as recommended by the manufacturer.  I chose this spot because it was out of the way and wouldn't stick out like a sore thumb.

Hole cut out for outlet box that will house the thermostat
Drilling holes for wires
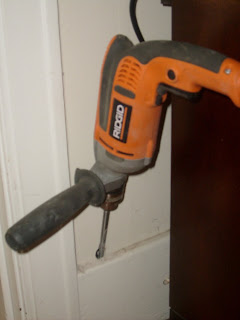
On the opposite side of the wall from the outlet box hole cut above I used a 16 inch spade bit to drill two holes, one for the feed wire from the circuit breaker box and one that goes to the heater.  Notice the angle of the drill?  I found that there was a doubled floor joist under here and the angle was necessary to clear it so I could pull the wires.  I drilled two holes through the floor from this one small hole by leaning the drill to the right slightly.  The hole itself can be easily patched later.
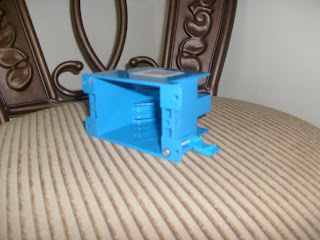
Remodel outlet box
This is what I call a remodel box.  Notice the silver screws?  They are attached to small wings that rotate around and tighten to secure the box in the wall.  They are nice because they can be located anywhere on a wall and don't need a stud to fasten it to.

Installed outlet box with wires installed
Here I have pulled the wires from the basement with a fish rod and installed the outlet box where the thermostat will be located.  The wire on the left is from the breaker box, the one on the right is to the heater. 

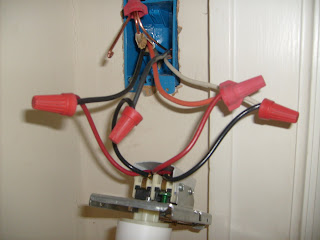
Thermostat wiring connections (ground wire left off for clarity)
I must admit that I can't read electrical schematics very well and that's all they had in the instructions for installing the thermostat, so I found these instructions in a discussion forum.  Evidently I wasn't the only one!

Looking at the back with the knob at the bottom.

"The Black Wires from the md26 are your load(the heater) and the red lines are your line(power). The lines are also paired up on the thermostat with a red and black on the left and are red and black on the right.

In the actual heater connect the black to the black wire and the white to the white and connect the grounds.

In the thermostat connect the black from the heater to left side black( remember there are pairs left(black, red) right (black, red) and the white to the right side black.

Connect the black from your power to the left side red and the white (red in my case) from your power to the right side red. Should be ready to go."

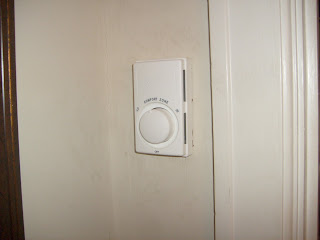
Thermostat installed
Wire from thermostat coming up from the basement
Knockout removed and wire installed
Here I removed the wrong knockout (see open hole) and then removed the correct one.  I used a snap in type romex clamp to secure the wire in the heater.  I like the snap in type connectors because, to me, they are easier to install than the other type with the nuts.

Heater wire connections
The electrical connections are made here and the baseboard heater is secured to the wall with a couple of drywall screws (black screws) on each end.  I left myself some extra wire behind the heater that I pushed back down into the basement.  I did this in case I ever need to pull the baseboard heater away from the wall to paint.
Installation complete
All in all, I thought this was an easy job.  It only took me a couple of hours, but I already had wire run from the breaker box, and easy access in the basement for running the new wires.  Here is what it cost:

1500 watt heater $54
240 volt thermostat $19
50 feet 10/2 wire $50  (I used about 20 feet on this heater, the rest I will use on the living room heater)
Labor 0$


Friday, October 22, 2010

Our new old house re-wire and new service panel

One of the first things I checked when we were looking at buying our new house was the wiring.  It was built in 1940 and had been sitting empty for almost 10 years because the original owner had moved to Florida because of her declining health.  It went on the market about 4 years ago, and remained there, probably because nobody wanted to tackle all of it's issues.  I love old houses because they are usually well built and established, and I can see the potential in them.   When I was inspecting it before we bought it, I found that it had good "bones", and the plumbing looked like it had been redone at one time, but the electrical wiring looked iffy.  I have done quite a bit of electrical work before, including replacing a service panel, so I didn't let that keep us from purchasing it.

The first thing we did was have a new service wire run in from the power pole by the local power authority.  The squirrels had been busy chewing on it and it needed to be moved over to a different location on the house to replace the old 100 amp meter box with a new 200 amp meter box.
Original service wire location and 100 amp box
New service wire installed and relocated by power company

At this point I hired a professional electrician to install the new 200 amp meter box I purchased at Lowes.  I knew my capabilities, and did not want to fry myself like a piece of bacon just to save money.  They charged me $400 to install the box, run the conduit, and make the connection to the new service wire.  You know it's dangerous when the electrician's every move is slow and deliberate.

New 200 amp box
Now on to the inside.  I knew I was going to need to rewire the house almost immediately.  The first time I tried replacing a light fixture, the old wire insulation just crumbled in my hand.  I decide at that point to make VERY sure my homeowners insurance was current and rewiring the house was priority number one.  I called my buddy Frank from Florida, and he came up for a week to help me tackle this job.  The picture below is of some spare wire in the basement.  It looked like asphalt impregnated cloth.

Old house wire
Here is what we started with.  It had the old screw in fuses with (16) 110 volt circuits,  (2) 220 volt circuits, and the 100 amp main breaker was a pull out type that was broken in half.  Off to the side was a small 4 circuit sub panel that also had screw in fuses.  The inside of the box had been rusting from an old roof leak that had run down the wall into it and some of the old wires had melted insulation near the ends where they had been overloaded.  I installed the new gray box (below) which served as a substitute for the main breaker which I couldn't safely remove in case of an emergency.  Before Frank arrived I started running new wires (white ones) and made temporary connections.

Scary huh?
See the gray box?
The orange and large black wire were new ones I ran for the stove and dryer.

Old electrical panel (note the missing stairs to basement)
Here are the new stairs.  The old ones were completely gone, I guess they had rotted away years ago.

Once Frank arrived we started rewiring.  We pretty much wasted an entire day trying to make sense of the way it was previously wired, and both agreed we shouldn't have even tried.  We ran over 1000 feet of 12/2 wire in the basement, 1st and 2nd floors, and attic.  Every receptacle outlet and light switch was replaced along with new boxes as needed.  We added outlets, moved some, and put most every room on their own circuit.  I hate to have to work on one room and have to shut off the electricity to half the house to do it.  Fortunately for us we had great access to run the wires in the basement and attic and any holes we had to make in the walls were small and easily patched.  Once all that was done we ran several hundred feet of new 10/2 wire to the two old style floor heaters and three 220 volt outlets.  Two invaluable tools you need are a fish rod and a fish tape .  These will make your life so much easier and you won't have to rip down the walls to run your wires.  The other thing to have is a Sharpie!  Write on the ends of the wires what room they go to so you can easily identify which circuit to add them to in the breaker box.

After all the wires were run we removed the old boxes and mounted the new load center .  Due to the cramped quarters around the new breaker box, I went down the stairs to the basement and routed the wires up to Frank, so he could make all the connections.  

Much safer and neater plus double the circuits.


We found these wire clips at The Home Depot.  They really make it neat.

Red wire clips
When all was said and done, we powered it up and everything worked!  Woohoo!  Really though, it wasn't as hard as you might think, plus it saved me about $10,000 dollars.  We had estimates that ranged from $9000 to $12,000 dollars.  Those estimates did NOT include repairing all the drywall that they would have torn down.  Like I said before Frank and I made small holes where we absolutely had to, and they were easily patched.  We are now safe and up to date.  On a side note, Frank made the trip up here on his dime.  He wouldn't accept a thing from us, but we did manage to sneak a new gas grill into the bed of his truck and feed him well while he was here.  He's one of a rare breed of friends and I'm glad to have him as my best one.  Thanks buddy!


Thursday, October 14, 2010

Answer for Allen about my mailbox


Thanks for the question Allen!  This is exactly what my intentions were when I had the idea of starting a blog and website.  You see, I have no problems sharing whatever I can to help.  If you can do it yourself, great!  If you can't, I will do it for you if you want.  I would rather do one off's (customized to you) than production work. If you look at my house pictures in the "Our new old house" tab, you can possibly understand why I went with this design.  In my opinion, the house can best be classified as a Georgian style of architecture.  With that thought in mind, my future plans for other elements (Footbridge, seated arbor, low picket fence), are going to stick to that theme for the sake of consistency.  Now on to your question.

I don't use plans.  There are several reasons why.  First and foremost, I just like to figure it out for myself.  Next, I can never find plans that are "exactly" what I need, or fit my particular application.  I usually get general dimensions and work off a rough sketch, creating as I go.

I started out making a basic box 12 x 12 x 60" out of 3/4" plywood with simple butt joints, glue, and nails.  Inside the box I put (2) 12 x 12 squares about 6" and 36" up from the bottom with a 4" square cut of of the center of those so I could put the completed mailbox over a 4x4 post set in concrete.  I made all the molding myself with a router out of regular pine boards and treated lumber. Basically you just apply the molding to create the frames and trim to the basic box.  You can use store bought molding too if you want, I just didn't want to run to the store for such small quantities (and I have to justify the expense of the router bits to my darling wife).  The top was actually four pieces of wood cut at a 15 degree angle.  I stacked one on top of the other, glued and clamped together, then sanded.  Once it was assembled I caulked everywhere I thought water could enter, then primed and painted with 3 coats of exterior paint.  Before I set it in place I sprayed the inside with Thompsons water seal.  I figured it couldn't hurt .

The Residential Mailbox Standards gave me the guidelines for mounting the mailbox.  I didn't want it to sit directly on the dirt, so I leveled off a small area and dug a hole about 18 inches deep to accept a 4x4 post that stuck up out of the ground about 4 feet.  I then made a form out of 2x4's and used (1) 80# bag of concrete to make a small pad and secure the post.  After all that was dry, I had my son Patrick help me lift the mailbox and slide it down over the 4x4.  That's it!

If you have any more questions, just let me know.  I'll be glad to help.  Please visit my other blog http://mywoodworkingsolutions.blogspot.com/ for some of my other projects.

Tuesday, October 12, 2010

Future project planning for walkway

End of walkway at the street.  I need to add steps down.  It's a 3 foot elevation change from the walkway to the street.  No ones probably ever going to us it since we park and enter at the back.  It's purely aesthetic.
Looking up toward the house.  Just finished resetting the stones on the upper third of the path last weekend.  They were either missing or scattered around the hill. The walkway is a little more than 80 feet long and 4 feet wide.
This is kind of what I'm after.  I would also like to add an arbor with seats and a low white picket fence.  Any ideas?

Monday, October 11, 2010

New Mailbox

My first post!  This is the mailbox I made one weekend at my shop.  I wanted something to fit the style of the house we bought last year, and after looking around, found the prices way higher than what it would cost me to make.  Its about 14 inches square and about five feet tall.   I left off the box that the newspaper would go in because carriers don't use them anyway.  I still need to add the oval house number plaque that will hang below the mailbox.  Sorry about the grass, it's been dry here.